
How To Draw A Pear. There are many different fruits in nature that we can enjoy! Not only are they delicious and healthy, but they often have unique shapes and colors that have made them a popular representation in art over the centuries.
Also, check our Free Printable Dolphin Coloring Pages.
As you learn to draw a pear, you can create your own drawing!
This guide in front of you will show you everything you need to know about how to draw this famous fruit.
If you follow all the steps we have prepared for you, you can draw it in no time!
We really hope you enjoy working on this step-by-step guide to drawing a pear in just 6 fun and easy steps!
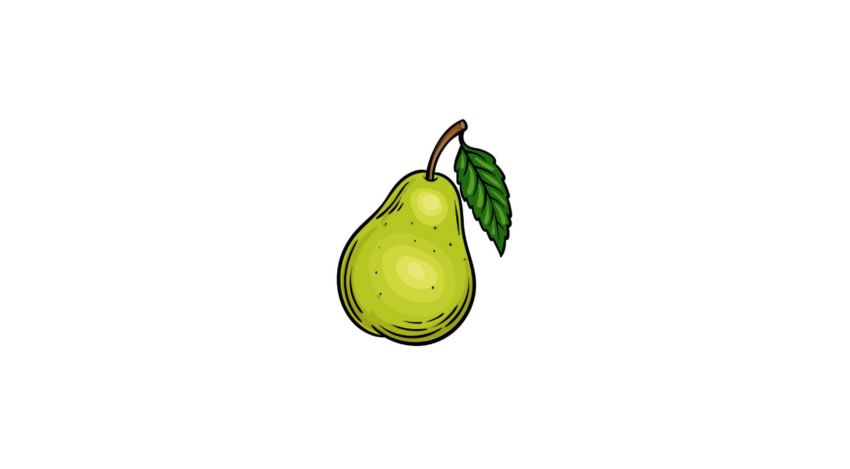
How To Draw A Pear
Step 1
Let’s start this pear drawing with the side of the pear’s body. In this first step we will also draw the stem on top. First, use a curved line for the left side of the pear.
The pear will be thin at the top and thicker at the base, which is already evident in this first step.
Then we draw the stalk. This is thin and curved and sprout from the top tip of the pear.
There is also a small curved line at the base of the stem that extends from the top of the bulb.
Then we can proceed to the second step of the guide!
Step 2
In this second step of our tutorial on how to draw a pear, we will finish the outline along with the rest of the leaf.
First, use another curved line to outline the “body” of the pear. As mentioned in the first step, the top half of the pear should be slightly thinner than the base.
Once the pear body is ready we can draw the leaf. It is attached to a short stem and the outline is drawn with an irregular line to give it a rough external texture.
Once this outline for the leaf is ready we can move on to adding some details in the next few steps.
Step 3
In the third part of this pear drawing, you will add some details to the leaf.
All you have to do for this part is add some fairly short lines going from the back of the leaf to the inside perimeter of the leaf outline.
These make up the veins of the leaf and as you can see in our reference image there will be quite a lot of them on this leaf. After these have been extracted, we can proceed to step 4 of the guide!
Step 4
We’ve completed the leaf and for this step we’re focusing on adding some detail to the pear itself that will give it some dimension.
These details will be quite small and simple, but they go a long way in making this pear look more realistic!
Just add some curved lines near the top and bottom curves of the pear. There are three rows for the top and two for the bottom, but you can choose more or less if you like!
Once these dimension lines are drawn, we can move on to the final details of this drawing.
Step 5
Before we get to the final step of this pear drawing tutorial, we’re going to add the final little details to the pear to make it look even better.
First, let’s draw some more curved lines on the right side of the pear to give it even more dimensional detail.
There will be a line for the top section with some small curved lines near the base.
After all, pears often have a whole range of blemishes. We will also add these in this step. You can draw them simply by dotting the pen all over the body of the pear.
Once these are added, feel free to add some details of your own! Maybe you could draw a background with other fruits or other foods that you would like to try them with.
Step 6
It’s time to finish off the pear drawing with some paint and that should be a really fun part of the process! In our reference image, we used shades of green and yellow for the body of the pear.
By changing the shades of these colors, you can give the pear a textured look by adding some shading as well.
These are just a few of the colors you can choose from, but there are many more options to choose from!
Your Pear Drawing is Finished!